Thursday, November 20, 2014

Step 1: The Set-up


The Plan: 
The plan is to record the films on our VHS cam-corder while running them on the original 8mm projector.  The recorded movies will then be digitized into a computer, edited, and copied to some DVDs for distribution.

What's needed:

  • Box of 8mm films - some labeled…most not
  • 8mm film projector 
  • Splicing equipment - scissors, tape, exacto knife
  • Telecine transfer box
  • Video camera
  • Calibrated camera height adjustment (Harry Potter Books 1 & 2, and one Clive Cussler paperback is sufficient)
  • A black shroud (a black In-N-Out T-shirt is preferred)
  • Video Digitizer & computer software
  • Computer with some software, such as:
    • iPhoto for slides
    • iMovie for editing the films
    • iDVD for creating a DVD menu
    • a Disk Utility to burn many DVDs easily
  • Ample supply of alcohol (not for cleaning…for drinking)

About 8mm Films
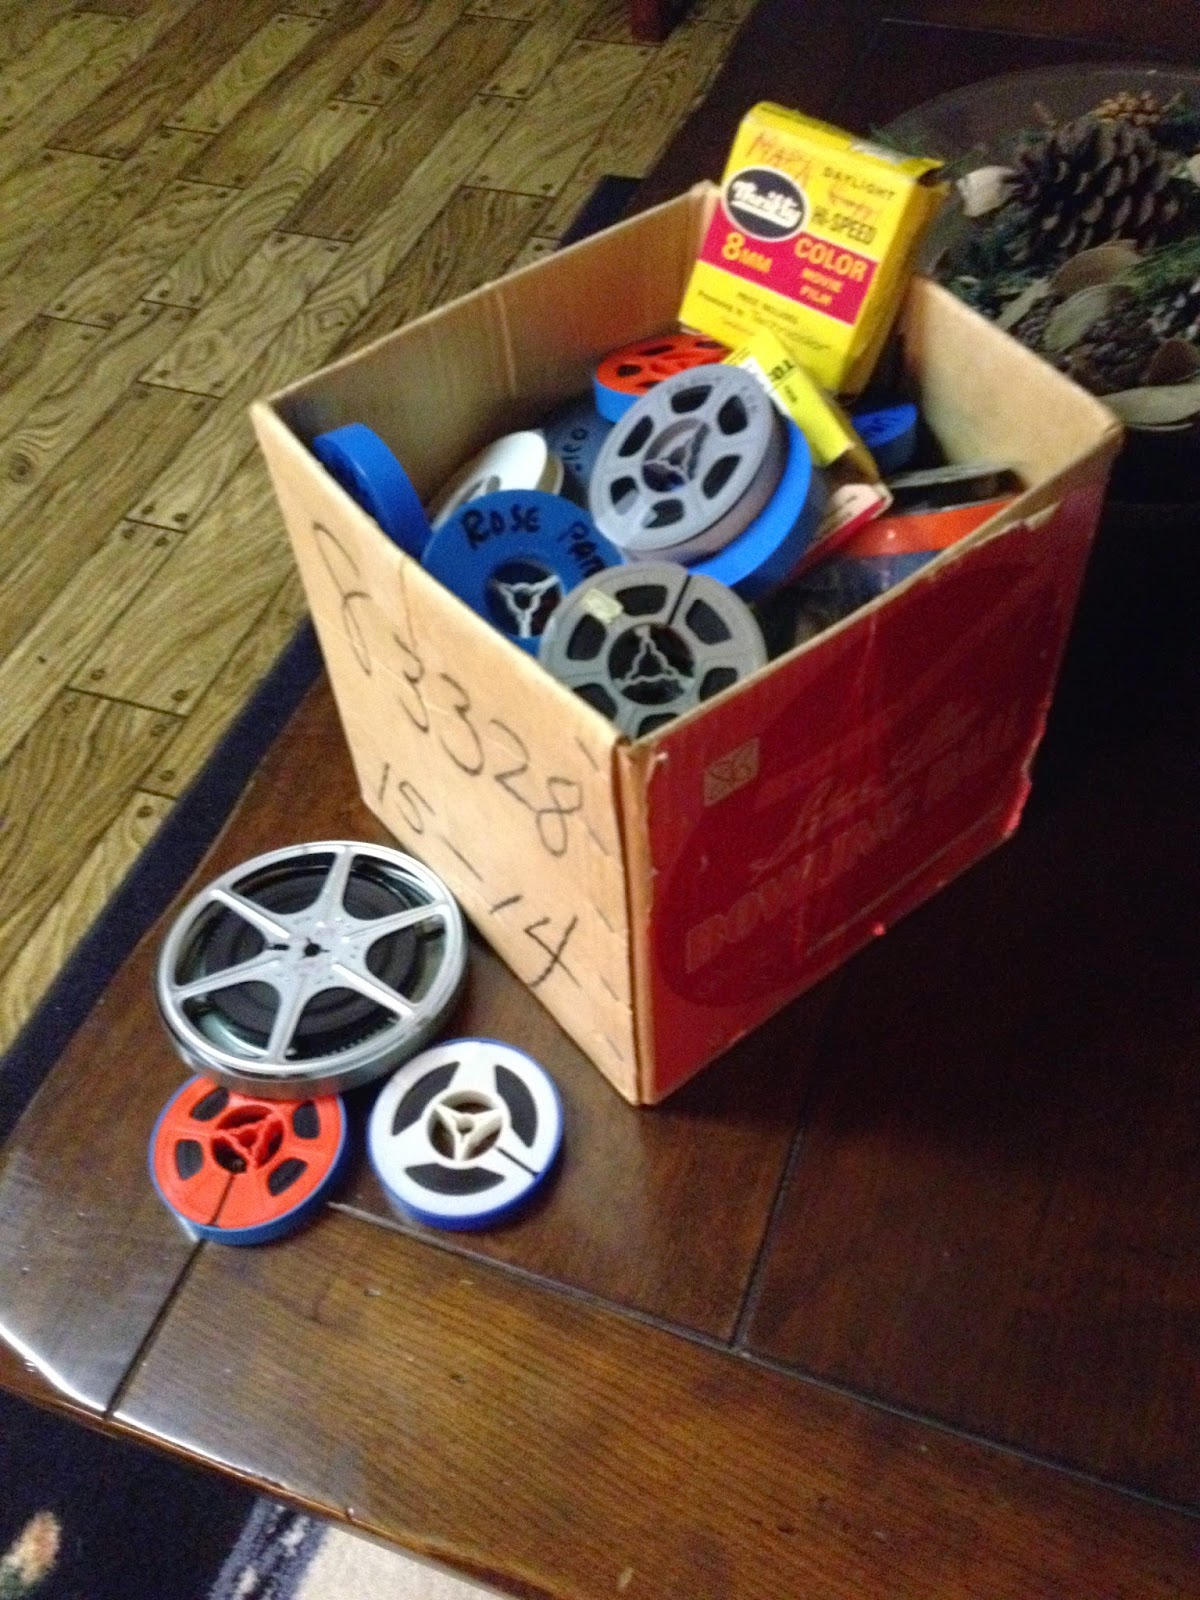
For those not familiar with the technology of 8mm films, a little background:  They came on reels of 16mm film with perforations on each side.  The film was loaded into a camera (while in a darkened room so as not let any light shine onto the raw film), and would provide between 3 and 4  minutes of footage.  When the reel was spent, the camera was opened (again preferably in a darkened room), and the film reel was flipped over and swapped positions with the take-up reel to allow additional footing to be recorded on the other half of the film.  When filming was complete, the film was packaged and mailed to a center where it was processed and  split down the middle to create two separate 8mm films.  

These two films were then spliced together to provide just under 10 minutes of footage.


Step one:  Set-Up

The Projector:
The projector is the original Bules family 8mm projector - still in working order, even the bulb.  The projector has three modes of operation:  Forward, Reverse, and aw, crap…the film broke again. Once the film reel was loaded, the motor was turned on (preferably forward, although reverse did occasionally happen requiring a few curse expletives, the film re-loaded again, and FORWARD motion  properly engaged).  The lamp was then turned on and you are in business.  However, the projector’s process must be closely monitored as the film will inevitably break, or jam inside the projector, or lose sync with the projector sprockets.  A film break required the whole process stopped, the film led out far enough so that it can be spliced with the other end, re-inserted into the projector in a hopeless attempt to restart the film where it left off.  

In some cases, a film losing sync with the projector sprockets can be cleared by stopping the projector, rewinding a few inches, and restarted.  You may notice this in watching some of the digital versions.

Transfer Box

The next item in the set-up is the Telecine transfer box (Mom Bules happened to already have one…for some reason).  The projector shows the movies onto a mirror and then onto a small screen inside the box.  The  Camcorder focuses on this small screen to record the film.

To ensure the best possible picture quality, a black shroud  (an In-n-Out black T-shirt being preferred ) is draped over the camera and transfer box to block out external light.


Camcorder

The Camera is a Panasonic VHS recording camera. The camera has a 120VAC power adapter, so running off of batteries wasn’t necessary.  The original plan was to record the movie onto a VHS tape, which then can be played back later into the computer.  What I found was that the camera has a live video output which can be played directly into the computer while the projector was running, bypassing the VHS tape nonsense.  The unit was placed in “camera” mode which provides the live video output.  Other set-up functions were: 
  • Eliminate the graphics overlay function showing the date, battery status, etc.
  • Eliminate the on-screen Message which says “Happy Thanksgiving!”
Occasionally, during an initial power-up session, these two steps went missing, causing a mad scramble during the recording process to turn these features off.


Digitizer

The actual digitizing process is performed by a Roxio "VHS to DVD”  hardware and software package.  The Roxio hardware unit receives the live video and audio signals from the camera, converts the video and audio to digital versions, and feeds the digital signals into the computer via a USB plug.

The software app which comes with the package provides the ability to start and stop the conversion process, name the file, and store the file somewhere on the computer.


Computer

The computer is a Macbook Air laptop.


Here is what the set-up looks like: 


Final Set-up

The final steps in the set-up is adjusting focal lengths and heights.  The transfer box comes with an adjustable stand so it can be set to match the center of the projector.  The camcorder required two books and a pamphlet to get its lens in the middle of the transfer box opening. Camera focus and projector focus are then adjusted to the best possible.


Wednesday, November 19, 2014

Step 2: Cameras Rolling!

Step Two:  Camera’s Rolling!

OK…let’s start the recoding process.  Feed the film in the projector; turn the  camcorder to CAMERA mode (remember to turn off the on-screen graphics features), start-up the software app on the computer; give a name to the first video recording (with no physical label on the reel - which most do not have - you may need to watch the first part just to see what the film is about) & click “start”; turn on the projector lamp; turn projector control to FORWARD; and check that all is in focus (the best you can).

Wait…what’s all that flicker in the video?  Turns out that since the film is being projected at 18 frames per second and the video camcorder is recording at 30 frames per second (the standard for TV), there is a pronounced flicker in the final product.  I found that this is quite common in amateur and low-budget conversion processes (of which I am both), and there are outside services which may charge up to $0.50 per foot of film to transfer the film and theoretically eliminate the flicker.  Since we have over 3300 feet of film, and knowing the Bules Vintage Films is a low-budget operation, we’ll just try and minimize the flicker.

I found a shutter speed adjustment on the camcorder which when adjusted will not eliminate the flicker…but it reduces the effects somewhat.  **SIGH**  Just another adjustment needed to be made when the recording process is started.


The Recording Process Goes Awry

All of sudden the projector goes into it’s “Aw...crap, the film just broke” mode.  Stop the projector; turn the bulb off; ignore the camera…it’s fine; stop the computer software app (which processes what it already has recorded, stores the resulting video on the hard drive, and get’s ready for the next recording process).

Un-stick the film from the projector, cut out what is obviously damaged, splice back together the remaining parts, re-feed the film back into the projector, and rewind the projector a few seconds so as to pick up where you left off (as close as you can).

Restart the process again:  Projector FORWARD, bulb ON, re-start the software app by giving it the next part of the film a new name (like same name only part 2) and click through the menu to start another recording process, and finally pray to the film God you can make it to the end without another breakage.

Other interesting variations of the playbook include film stutter, which is what happens when the film holes are too worn and the projector sprockets can’t get a firm grip.  The film starts jumping up and down trying to work through the sprocket feed.  You might be able to clear the problem by stopping the projector, rewinding it a bit, then going forward again in a naive attempt to ignore the previous problem (the film must have been simply confused).  Leaving the computer software running will record your foolish attempts at restarting the film.

Another film audible is jamming, where the film can’t make it through the sprocket feed at all, and starts getting constipated ahead of the sprockets.  This requires removing the film from the feed, manually rewinding some of it, re-insert the film back into the projector, and trying it again (see "praying to the film God" above).  You may want to stop the computer software app when this happens, otherwise you‘ll be recording blank video. 


What for Audio?

The output of the camcorder and the input to the Roxio digitizer include connections for video as well as stereo audio signals.  Not thinking about what I was doing, I plugged in all of the connections and started the recording process.  When playing back the very first recorded video, I then realized that 8mm film does not have any audio - it is silent movie technology.  The camcorder, however, does have audio recording (for its VHS tapes), so what I got was a very nice audio recording of the projector chugging away.  Unplugging the audio cables solved that problem, however, one of the first films recorded still has some projector noise in the background.  


Space/Time Continuum

Without some pre-planning, you may be in jeopardy of destroying the whole space/time continuum as we know it (or at least as I know it). This whole film-to-DVD process uses a very large amount of hard drive space.  This project involves around 50 film reels providing just under 5 hours of movies.  Digitizing each film reel requires between 300 - 400 mbytes of storage.  Just this first initial phase of recording will require nearly 25 Gigabytes of storage.  By the time we get through the editing process, voice overs, final video conversion, and disk imaging copies, nearly 100 GBytes may be required.   

Plan ahead or, like me, you will be scrambling in the middle of the process trying to find more storage space.  You may ask why I didn’t just use the “cloud" instead of relying on hard drive storage.  The reason is that the internet speed at our location is so slow (insert slow internet joke here):

My internet speed is so slow that….” [please hold while remaining part of joke is still loading].  


Anyway, I would like to complete this project before DVDs become obsolete altogether.


The next step will be about editing.

Tuesday, November 18, 2014

Step 3: CUT! CUT!

 The recording process in Step 2 creates a bunch of raw digital MPEG (.mpg) video files.  These files may be parts of the same film reel, or have long blank sections where you fiddled around with the projector without stopping the recording, or the film itself has blank parts or sections where sunlight washed away the visible parts, etc.  Hence, there is a need to cut out some parts, re-join other sections, and basically edit the films. 


iMovie Software App
On the MAC computer, I used Apple’s iMovie version 9 as a video editor.


The iMovie app has two sections:  the bottom section are the individual video files or "events" which represent all of the raw video files.  These “events” files take on whatever file name used during the initial camcorder video recording process.

The upper section of the iMovies app is where the the final video “projects” are created.  Events are selected and "dragged" into the project section where the files can be cut, split, sections deleted, re-arranged, etc.  In some cases I combined several video clips from different "event" films in order to create one master video project of a common topic, such as combining all of the Rose Parade films into one single "Parade" video file.


The Projects section also allow the addition of Title screens and other transition graphics.  For example, graphic overlay texts are sometimes added on top of the video to explain what the film is representing, or when a change in scenes happens.

iMovie Title Side


So using this editing application and process, all of the raw video files are edited and merged into multiple master projects.

Next Step:  Voiceovers?


Monday, November 17, 2014

Step 4: Slides, Slides, and More Slides!


I was just finishing up the video editing process, foolishly thinking I was over half way through with the project, when Mom Bules brings out from her closet a stack of four Kodak Slide Carousels.  “Don't forget these” she says. With about 80 slides per carousel, I had over 360 slides to digitize and turn into some sort of video.

This slide process requires a method to scan and digitize each slide.  Another trip to Best Buy to pickup an Ion slide converter.  This unit scans the slides, digitizes them and stores them on a small SD memory card.

Ion Slide Converter
So I set this up, and scanned all 360 slides one-by-one making sure each one was at least not upside down (few would recognize a slide in backwards…unless there was some kind of printing in the background).


iPhoto App (Slideshows)
I then uploaded the slides into an Apple app called iPhoto.  This app can create a slide show with programmable timing between slides, adding a Ken Burns effect (which is the effect of zooming in or out or sideways on a slide).  

I rearranged the slide sequences to make chronological sense, and when finished, exported the slideshow as a video file.  I made four video files, one to represent each slide carousel.


These slide video files were then loaded into the iMovie app where a title slide was added and prepared for the next step.


Next Step:  Voiceovers


Sunday, November 16, 2014

Step 5: Voiceovers

Since the films were silent, we thought it would be a nice idea to add some voiceovers to the video projects.  This would allow identification of some of the people in the film, the location, and hopefully the timeframe. 

iMovie in VoiceOver Mode
I set up Mom Bules and my wife Diane in front of my computer running the iMovie app which has a voice over function.  While the movie runs in the corner, the computer records an audio track.  


iMovie showing Audio Tracks
Now, Mom Bules is, how shall we say this...technology challenged?  She does not own a computer, nor a tablet, nor a smart phone.  She has no email address, she's not on Facebook...and her VCR is still blinking 12:00.  As I set up the app to do a voiceover recording, she's starts talking about the video before the computer is even ready...or has to be reminded to start talking way after the "beep" happens...or she is distracted by some of the other videos on the bottom of the screen and starts talking about them instead of the actual video being shown.  ***SIGH***

With Diane's help, we got through the voiceovers without anyone getting hurt.  It took several sittings to get through all of the movies, and most took only one take...and they actually turned out pretty good.

Next step:  Creating the final Video files


Saturday, November 15, 2014

Step 6: More Editing & Re-Do

Throughout this process, I did random checks on the quality.  I created a few DVDs of what might be the final product...or perhaps prototypes...and ran through each DVD to check:  Are all of the films in the right order? Titles correct?  DVD Menu works?  With silent movies, it was not necessary to have the computer volume turned on (I normally have it off).  However, now that voiceovers were added, the quality review needed to also include the audio tracks.  

This review discovered two problems with the audio:


  1. One of the videos was missing half of it's voiceover track. What the heck.  I loaded this up in iMovie and found, sure enough, somehow that particular audio track was missing.  We'll have to have Mom re-do the voiceover for this missing section
  2. When I reviewed the slideshow videos, the voiceover tracks were there, but there was also some kinda music in the background.  What the heck.  There was no music playing when we recorded the voiceover tracks.  I read somewhere that iMovie has the ability to add stock audio tracks to your video projects.  I checked the settings to make sure this feature was turned off...it was.  So where did the music come from?  


iPhoto Slideshow showing Music Option
Since this background music only occurred in the slideshow videos, I went back further to the iPhoto app where the slideshows were originally created.  Viola!  Sure enough, iPhoto has a feature of adding background music to a slideshow...and that feature was ON.  So, turn that feature OFF; re-export the slideshow to a video file; re-load the file into iMovie; delete the old slideshow video; and synchronize the voiceover track with the new slideshow video.

During this whole process, I stumbled on a couple of raw video files which somehow missed getting into this project.  These happened to be the very earliest of 8mm movies made, so it was important to add these to the project.  They also required some minor edits and, of course, voiceovers.

So, back to Mom's to do some more voiceovers.

...and with all of the projects now accounted for, edited, and complete, it is time to go into production...I think.


Friday, November 14, 2014

Step 7: The Video Factor

Early on in this process, a decision needed to be made on what form the final video product should take.  Should I upload the videos on Youtube, and let the family access them?  Should I store the videos on a USB memory stick, and mail them out to family members?  Should I create a DVD of the videos and mail them out?

The final decision was DVDs, for several reasons:

  1. The Youtube option heavily involves uploading between 17 and 20 GigaBytes - just not going to happen with our network speed.
  2. 32GB USB memory sticks are $25 - $30 each.  I need 18 of them.  Did I mention Bules Vintage Films is a low budget operation?
  3. DVDs are cheap. 

Plus, many of the films contain multiple subject matters.  Distributing them as individual files for a computer to read doesn't allow me to define the multiple subjects contained in each video.

And finally, Mom Bules can't even spell USB..and she's going to read them on a computer?

DVDs it is.

Next question:  What should be the digitization quality of the final video products?  Now that the video "projects" work is complete, they need to be converted to a final video format.  If the digitization quality is set too low, then the videos will make the films even worse than they already are.  Too high, and the video files take up too much space (after all, they are only 8mm films).

So disk space becomes another factor.  One standard DVD can hold 4.5Gbytes of DVD-formatted videos.  Adding up all of the video file sizes, it looks like we'll need at least 4 DVDs.  I want to keep it at that level, and not require more than 4 DVDs per set.

The app iMovie can convert the video projects into a variety of video format types and qualities.
iMovie Video Formatting Options
I tested the Medium, Large, and HD options on the same video.  Medium offered an obviously lower-quality video product.  Too many digital artifacts and a rather high fuzzy-ness factor.

The Large and HD version seemed about the same to me, no need to go to HD quality, since it created much larger file sizes.

So the step is to convert (or "share" in iMovie terms) each video project into a "Large" video file.

Thursday, November 13, 2014

Step 8: Got DVD?

Once it was decided that DVDs were the distribution method of choice, I needed a software app that could create and customize DVD menus, and eventually burn the DVDs.  The MAC did not come with a default app for this, other than a simple disk utility app which can burn a CD or DVD...once the menus and files were created and formatted correctly.

I tried downloading a couple of freebie apps (see: low-budget operation in a previous post) such as MediaFire and another one I can't even remember...but they were extremely unreliable, and wouldn't let me customize things like multiple DVD menu pages, custom colors & graphics, etc.

Some time back, Apple provided a DVD project/burner type app called iDVD which was supposed to provide all of these features and more.  Unfortunately, they stopped including it with new MACs in hopes that we would use their iCloud service instead of DVDs or hard drives.

I could find nothing else that would work without buying some expansive 3rd party app.  I was convinced that iDVD was the app I needed...and through considerable research, I was finally able to locate a version.  Now I'm in business!

Through iDVD, I organized the videos for each DVD, create custom title slides/buttons for each movie, add extra pages to the menu, and test the results.
iDVD Menu Editor

For my next trick:  organize the videos to fit on all four DVDs without exceeding the storage capacity of any one DVD.  This took a little juggling, but they eventually all fit...but with no spare space remaining.  

The DVDs were organized as:

DVD #1:  50's and early 60's
DVD #2:  More early 60's 
DVD #3:  Late 60's and 70's
DVD #4:  More 70's and Slideshows, and other misc movies  

Of course, once the four DVD menu edits were finished, everything fits, and the test set of DVDs look good, I found  two additional videos which somehow didn't make the DVD cut.  Not sure why or how, but they were digitized as raw videos, but never edited into a video project, no voiceovers, nothing.  Since those films were one of the very earliest made, they needed to be part of the package...and they needed to be part of DVD #1.  However, they won't fit, I can't delete anything else to make room, nor could I move a few videos to some other DVD...they were all full as well.  

The only option was to encode DVD #1 as a lower encoding standard.  When a DVD is burned, the software app "encodes" all of the video files, menus etc. into a specific format to operate as a DVD video.  Lowering the encoding standard may use less space...but it also may sacrifice video quality.

I tested this lower encoding standard against a normal encoding rate, side-by-side, and didn't notice much of a difference.  I left the other three DVDs encoded at the default higher encoding standard.

Once the DVD menus were finished editing, it is time to start burning DVDs.  

DVD Burning Set-up
The Set-up to make 18 sets of DVDs included:
  • 2 stacks of blank writable DVDs
  • 2 stacks of Dual DVD cases
  • 1 package of CD labels
  • DVD/CD reader/writer unit
  • iDVD software application
  • Disk burning software utility

The iDVD software was capable of burning DVDs, but it was rather cumbersome to use to burn multiple DVDs over several days...or weeks.  

The better method was to have iDVD create what is called a disk "image" and save it to the the hard drive.  Then, using the Disk Utility software app (standard MAC software),  it used these disk images to burn the DVDs - 30 minutes per DVD burn.

Print the labels, package up the DVDs...and ship those suckers out.


Oh...and write a blog about what you did.